
Adjustment & Torquing
Everything you need to know about adjustment and torquing
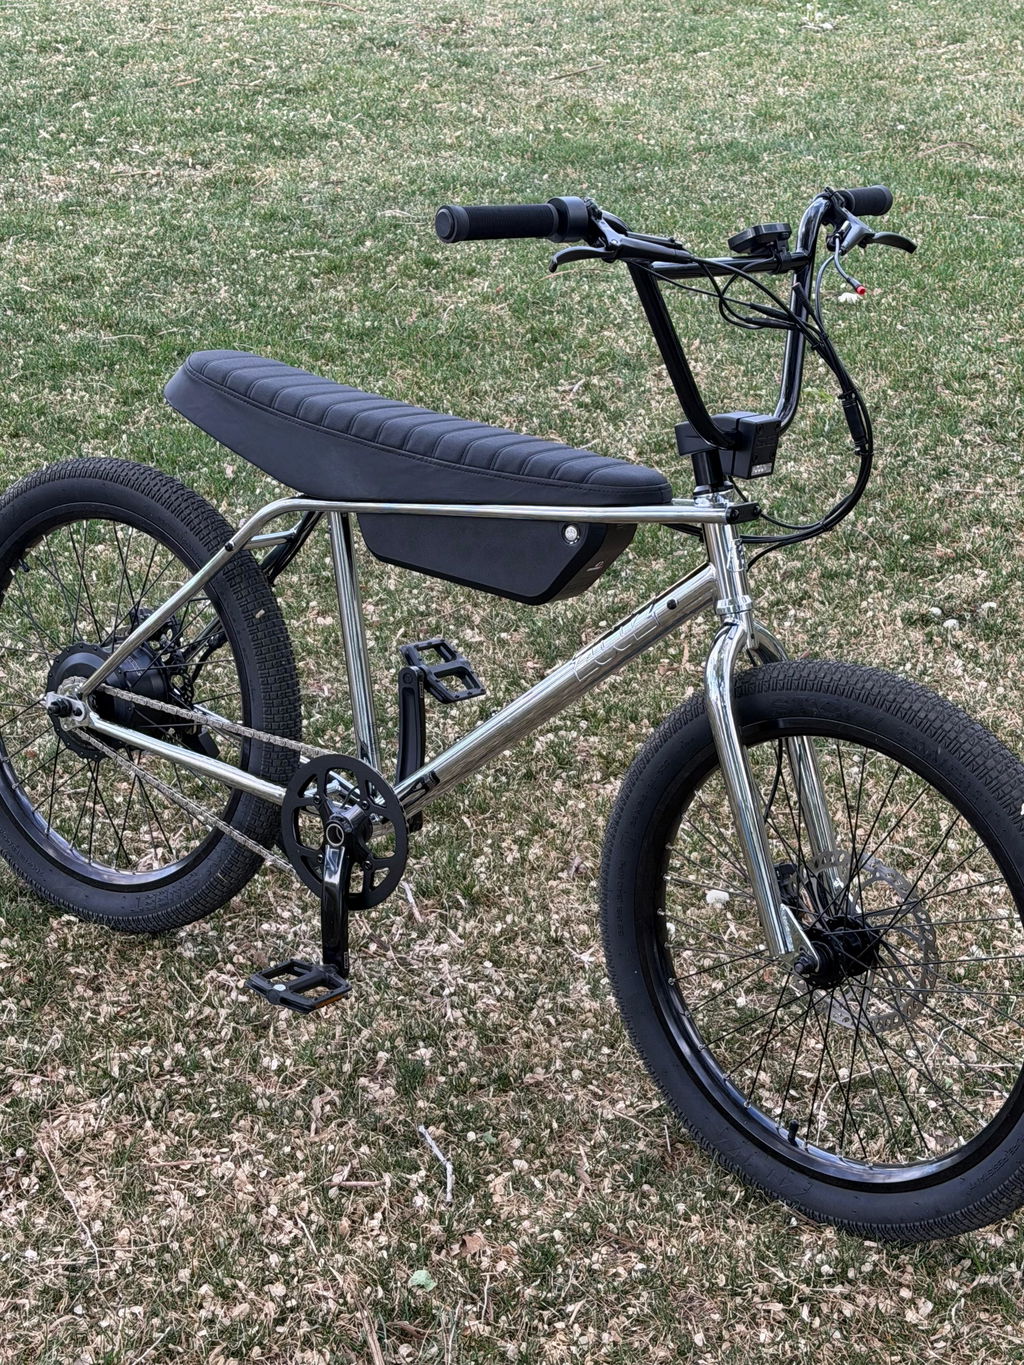
REAR WHEEL ALIGNMENT, CHAIN ADJUSTMENT
Rear wheel alignment and chain tension should be checked often. Electric bikes sustain higher speeds and forces than standard bikes. Movable/adjustable parts can move more frequently than regular bikes. Make sure the rear wheel is properly aligned by equalizing the spaces between the rear wheel/tire and the frame on either side using the adjusters. You must also make sure that there is chain tension for proper function.
- To do this, slightly loosen each axle nut on the rear axle and the lockout nut on the adjusters until the axle slides freely into the axle slot.
2. Align the rear wheel while maintaining chain tension by tightening the adjuster bolts incrementally on each side. After the axle is in the correct position, tighten the adjuster lock nuts, then tighten the axle nuts to 60 newton meters.
3. The rear tire should be pressurized to fit the rider’s weight and terrain. Lower pressures help smooth rough terrain and provide more traction on some surfaces. 30-35 PSI for normal road terrain and rider 120-180 lbs. Add more PSI up to the maximum recommended pressure labeled on the side of the tire for heavier riders as needed.

4. Visually inspect the chain and all mechanical parts daily and lubricate as necessary. Using standard chain lube periodically will keep your chain clean, quiet, and functioning properly. Wipe away excess lube, grease, and oil to prevent dirt buildup.
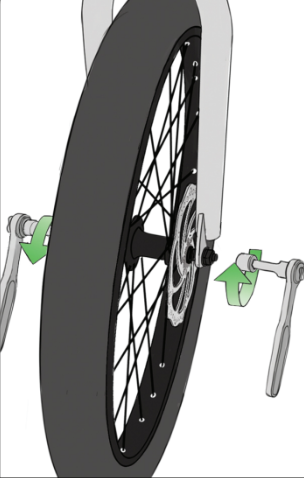
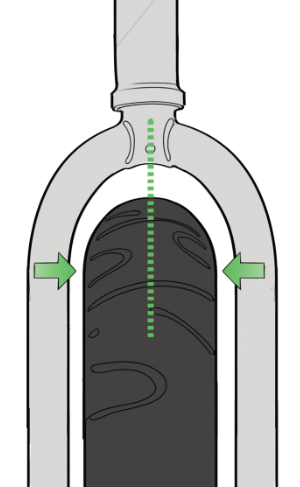
FRONT-WHEEL ALIGNMENT
The front wheel should not ever come loose under proper assembly and torquing. However, you should be sure that the axle is completely settled in the axle slots, hook washers are in place, and the axle nuts are torqued to 25 newton meters.
The front tire should be pressurized to fit the rider’s weight and terrain. Lower pressures help smooth rough terrain and provide more traction on some surfaces. 30-35 PSI for normal road terrain and rider 120-180 lbs. Add more PSI up to the maximum recommended pressure labeled on the side of the tire for heavier riders as needed.
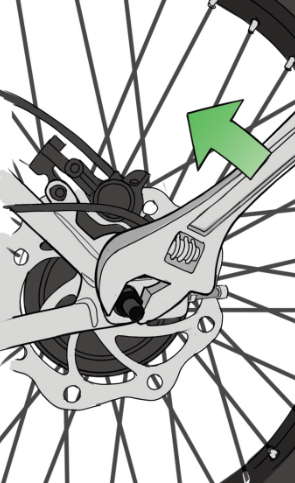
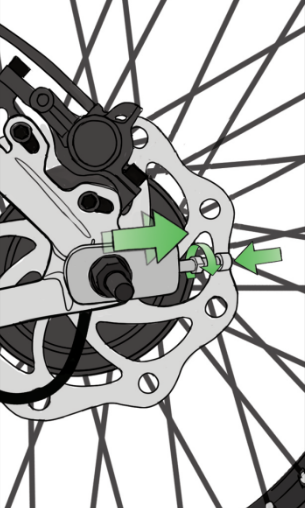
BRAKE CALIPER ALIGNMENT
Brake caliper alignment/adjustment. It is common to get some noise from brake discs if they are not perfectly aligned and properly working. This can occur after heavy use.
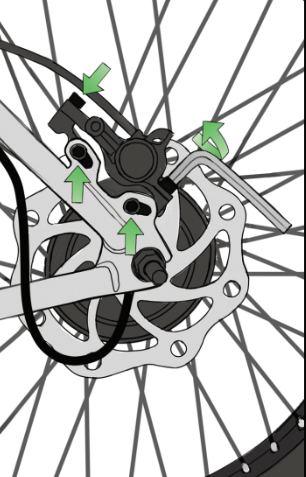
Loosen the adjustment bolts and lightly position the brake caliper on the disc. An easy method is lightly holding the brake lever to center the brake caliper on the disc.
Then tighten the bolts incrementally up to 12 newton meters. This can take a couple of tries and may take some manual/eyeball adjustment.
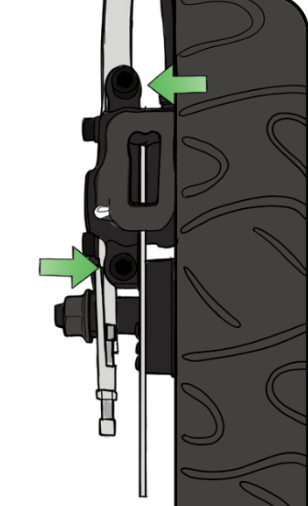
The brake caliper mounting brackets (frame/fork to brake caliper bracket) should always be securely tightened to 12 newton meters.
STEM, FORK, HANDLEBAR
This controls your handlebar alignment and must be snugly fitted for safe riding. The steerer tube and stem must be tight and exhibit no "play" or wobble in the steering head.
You can check this by loosening the bolts on the side of the stem and tightening the cap bolt to pull the "stack" of steering bearings and spacers together. Do not over-tighten the cap bolt, but the stack of bearings and spacers on the steerer tube should be tight.
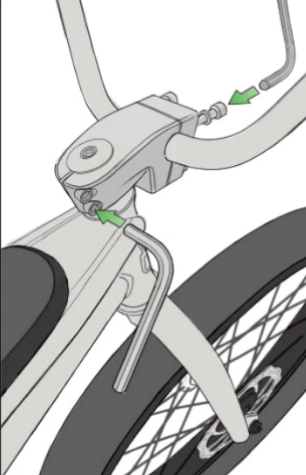


Now check the alignment and angle of the handlebars and tighten the handlebar clamp bolts. All bolts on the stem should be torqued to 20-newton meters.
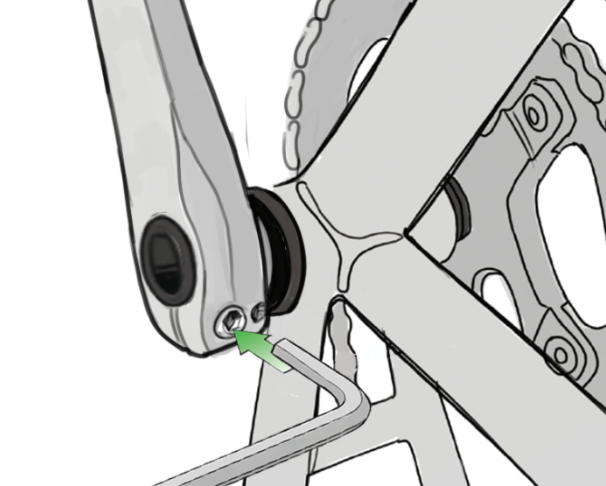
CRANK BOLTS
Crank bolts should be checked and torqued often to 20-newton meters. Apply light grease whenever re-assembling. Do not over-tighten for the risk of stripping the bolts.
CONTROLS
Each control unit - brake levers, throttle, and display- has bolts that tighten to secure their position on the handlebar. You can loosen these bolts to adjust the angle of these controls and align them to a position that you find comfortable but should make sure they are tightened to where they don't move during use. Hand tighten! Do not over-tighten.
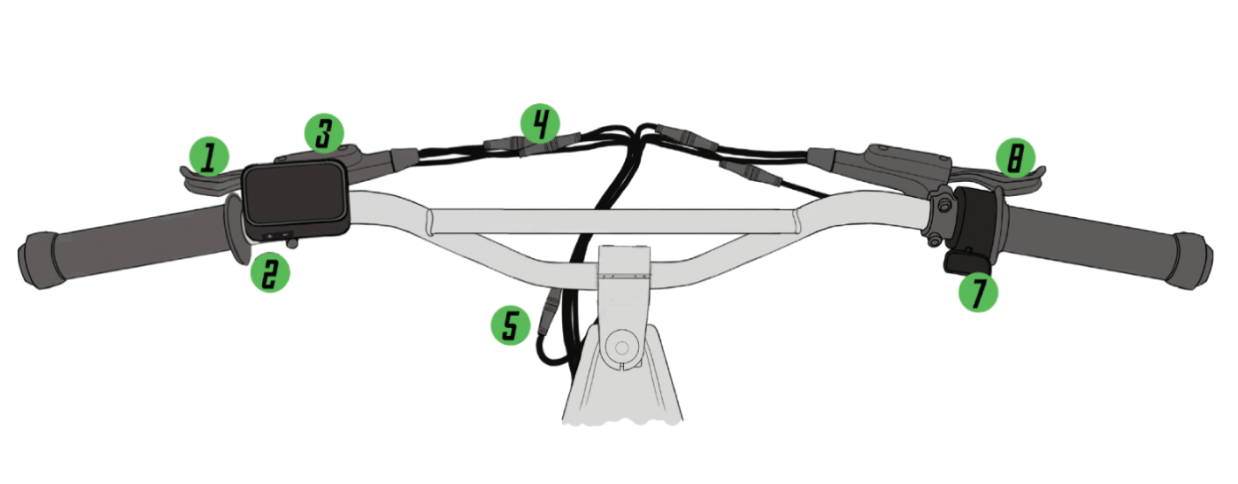
- Front brake lever
- Display
- Front brake master cylinder
- Control connectors
- Headlight connector
- Rear master cylinder
- Throttle
- Rear brake lever